Sailing (Pirate) Ship - 2019 PBR Retexturing
Decided to use the Ship I modelled in 2016 for uni (when first learning to use Maya, making it my first real model in the software (and first 'environment'/big prop model)) to learn about PBR texturing & more about using Substance Painter. I made some minor fixes to the geometry but most of it is the same, & entirely redid the UV unwrapping. Still figuring out the best way to layout UVs & separate them as texture sets, and how to best optimise maps/materials (e.g. resolution), but the main point of this personal project was learning more about Substance Painter & attempt a PBR/better texturing for this ship, and I did learn a lot! So, the geometry + maps aren't the most optimised & there's still a lot to learn & practice, but I'm really happy with the learning journey so far. Time to move on to other projects & keep progressing!
Software used: Maya (modelling, UV unwrapping, rendering with Arnold), Substance Painter (texturing), and Photoshop (texture compositing/fixes).
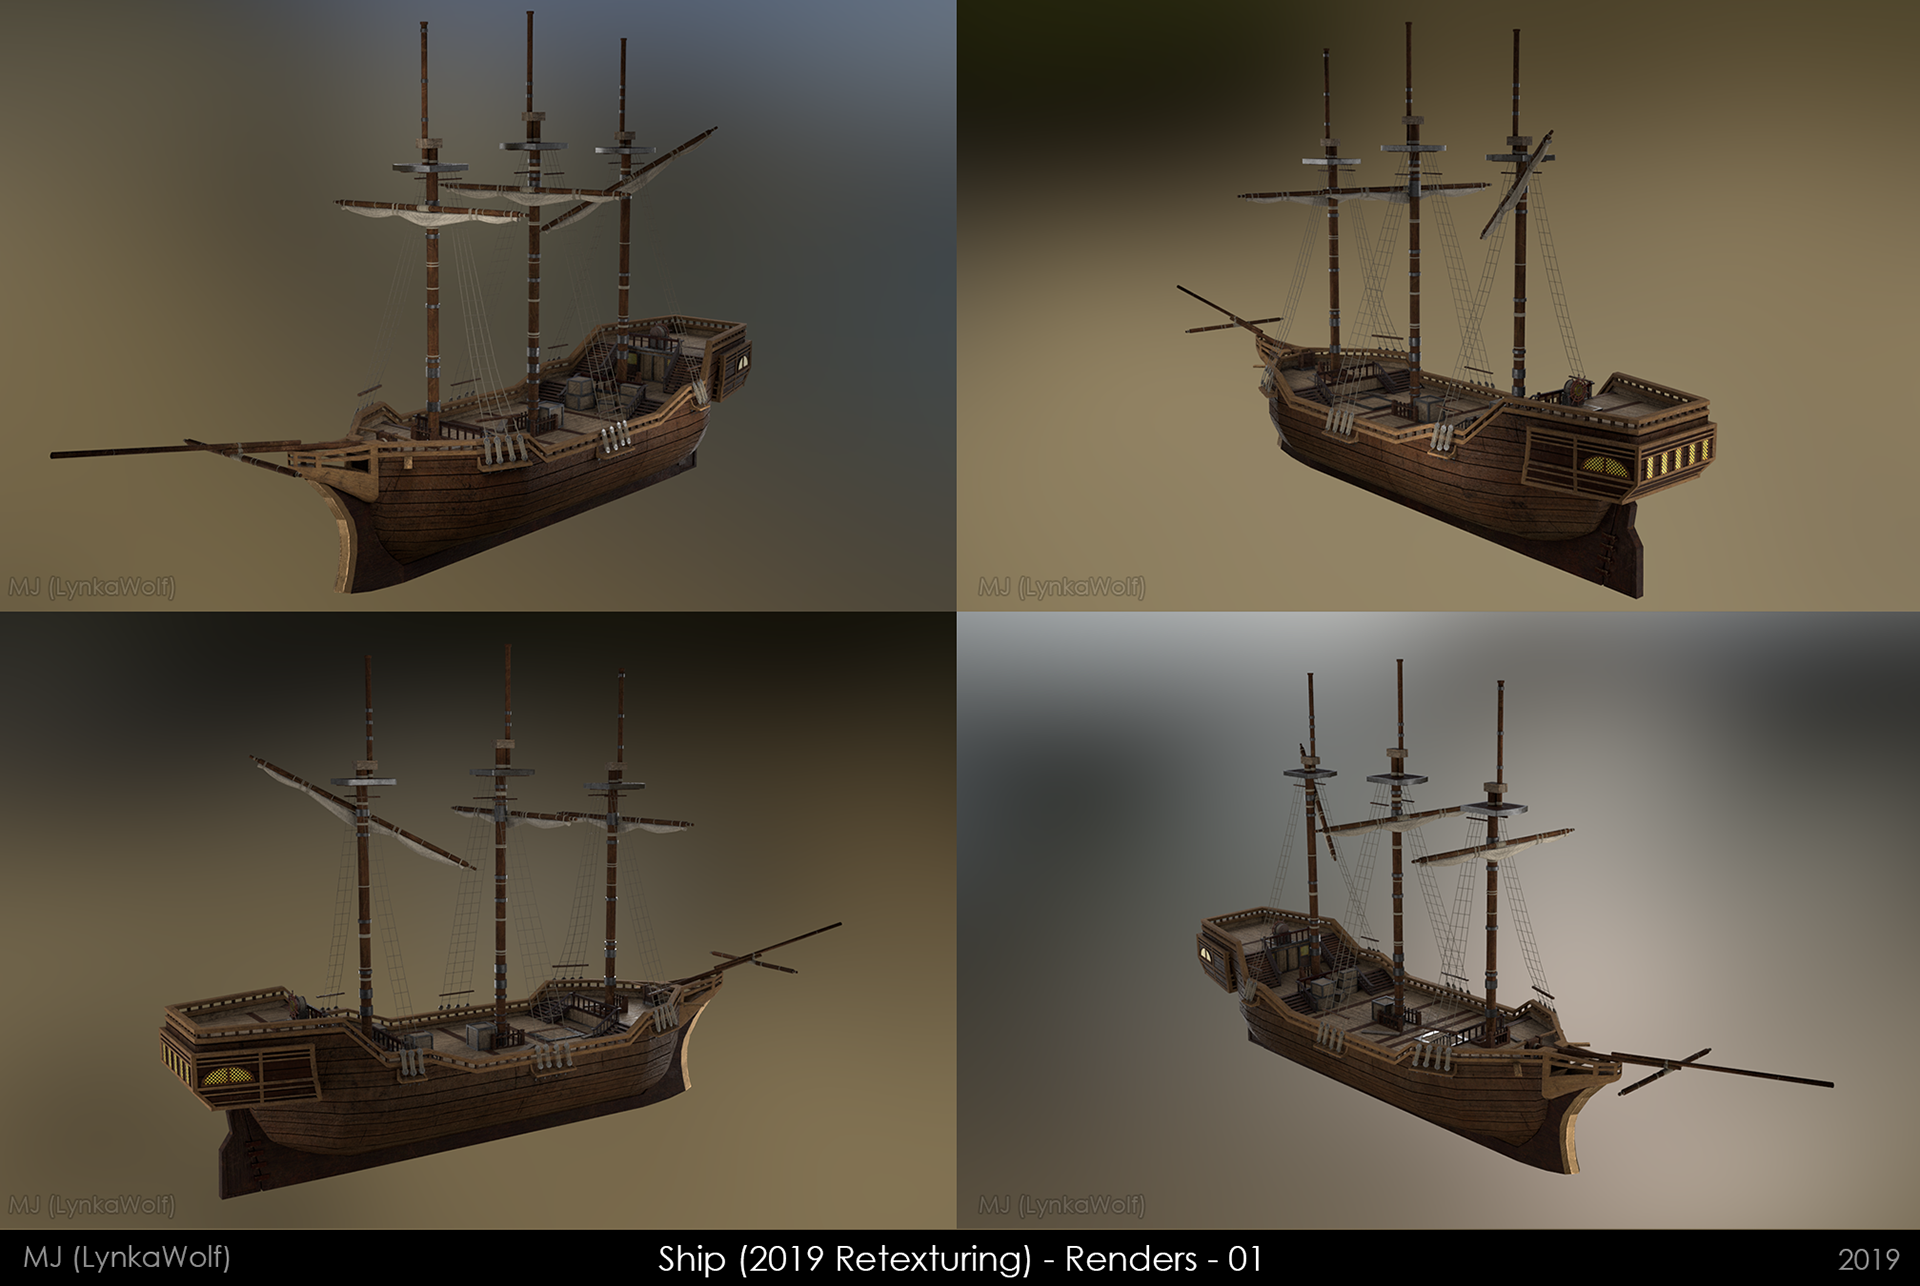
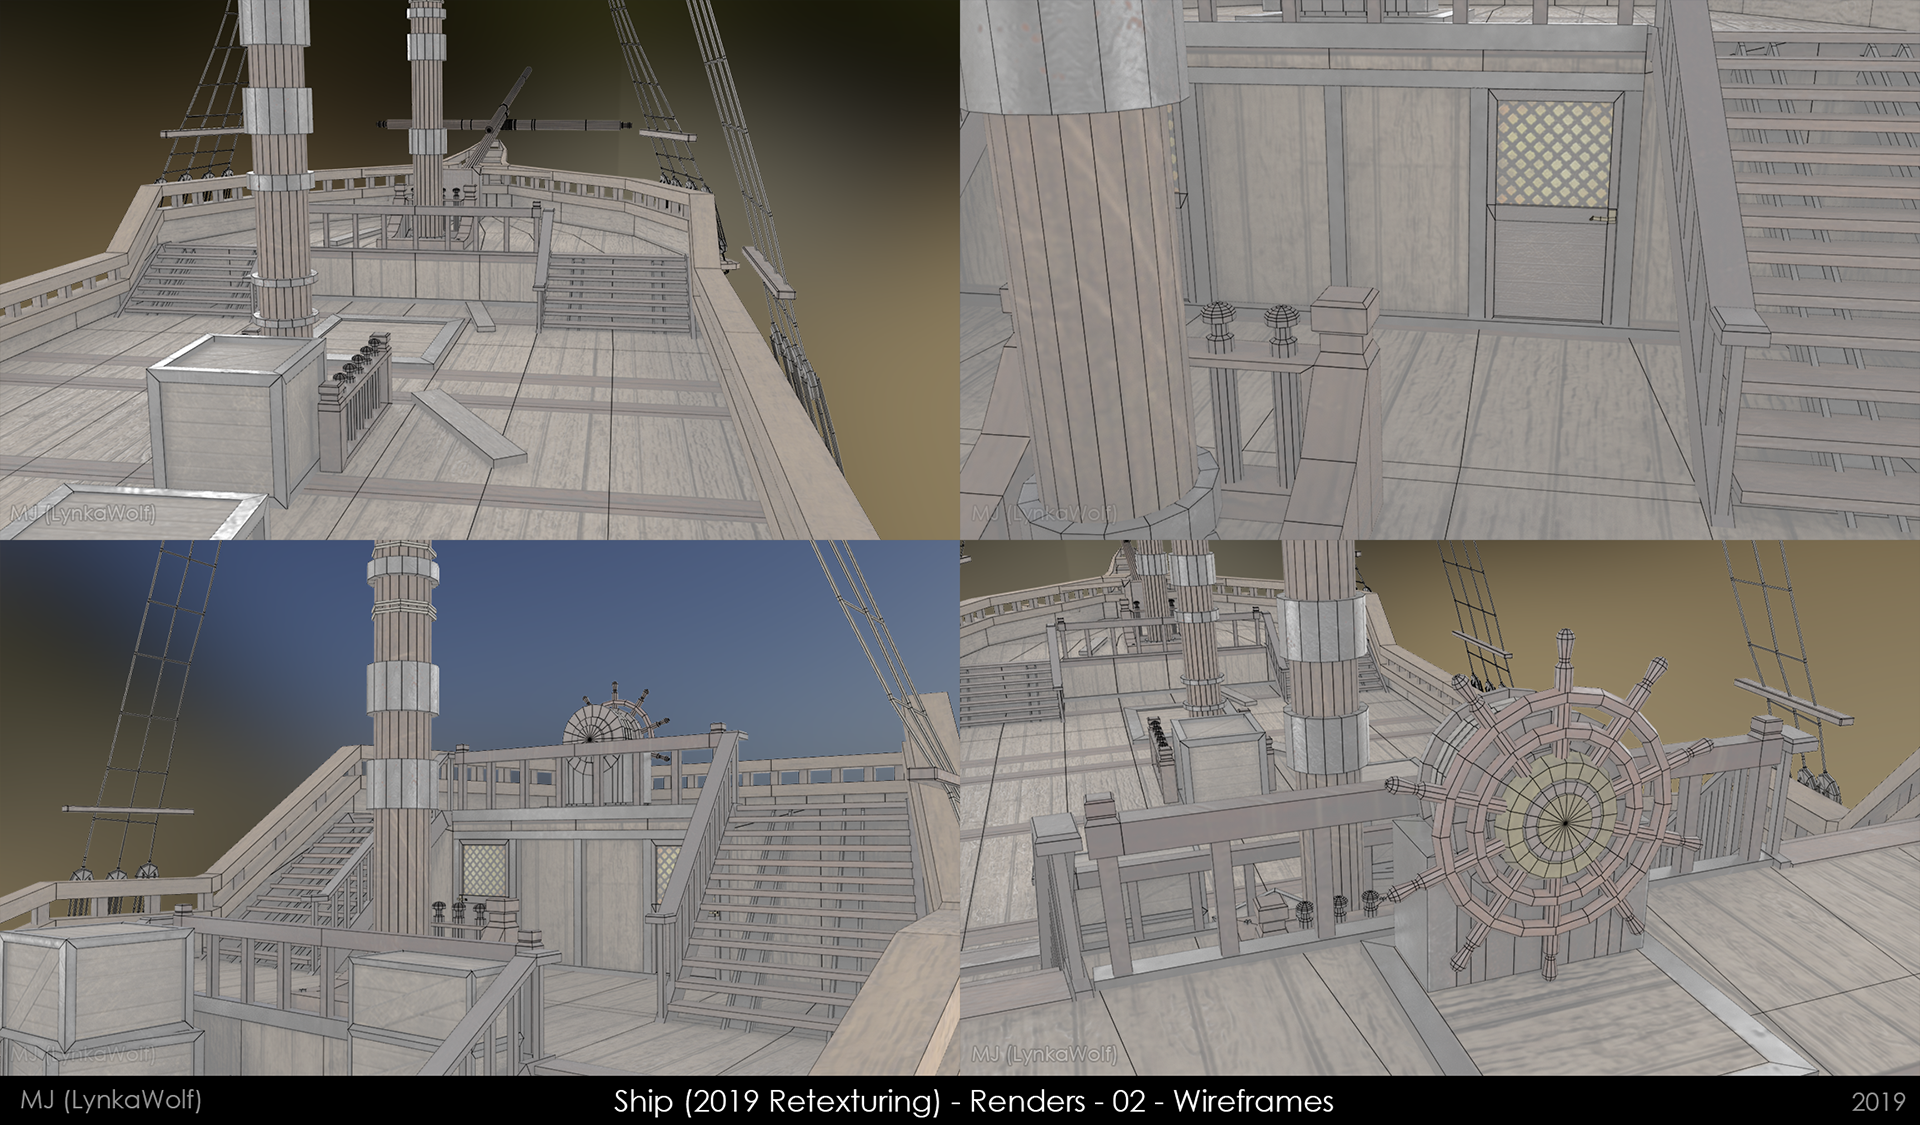
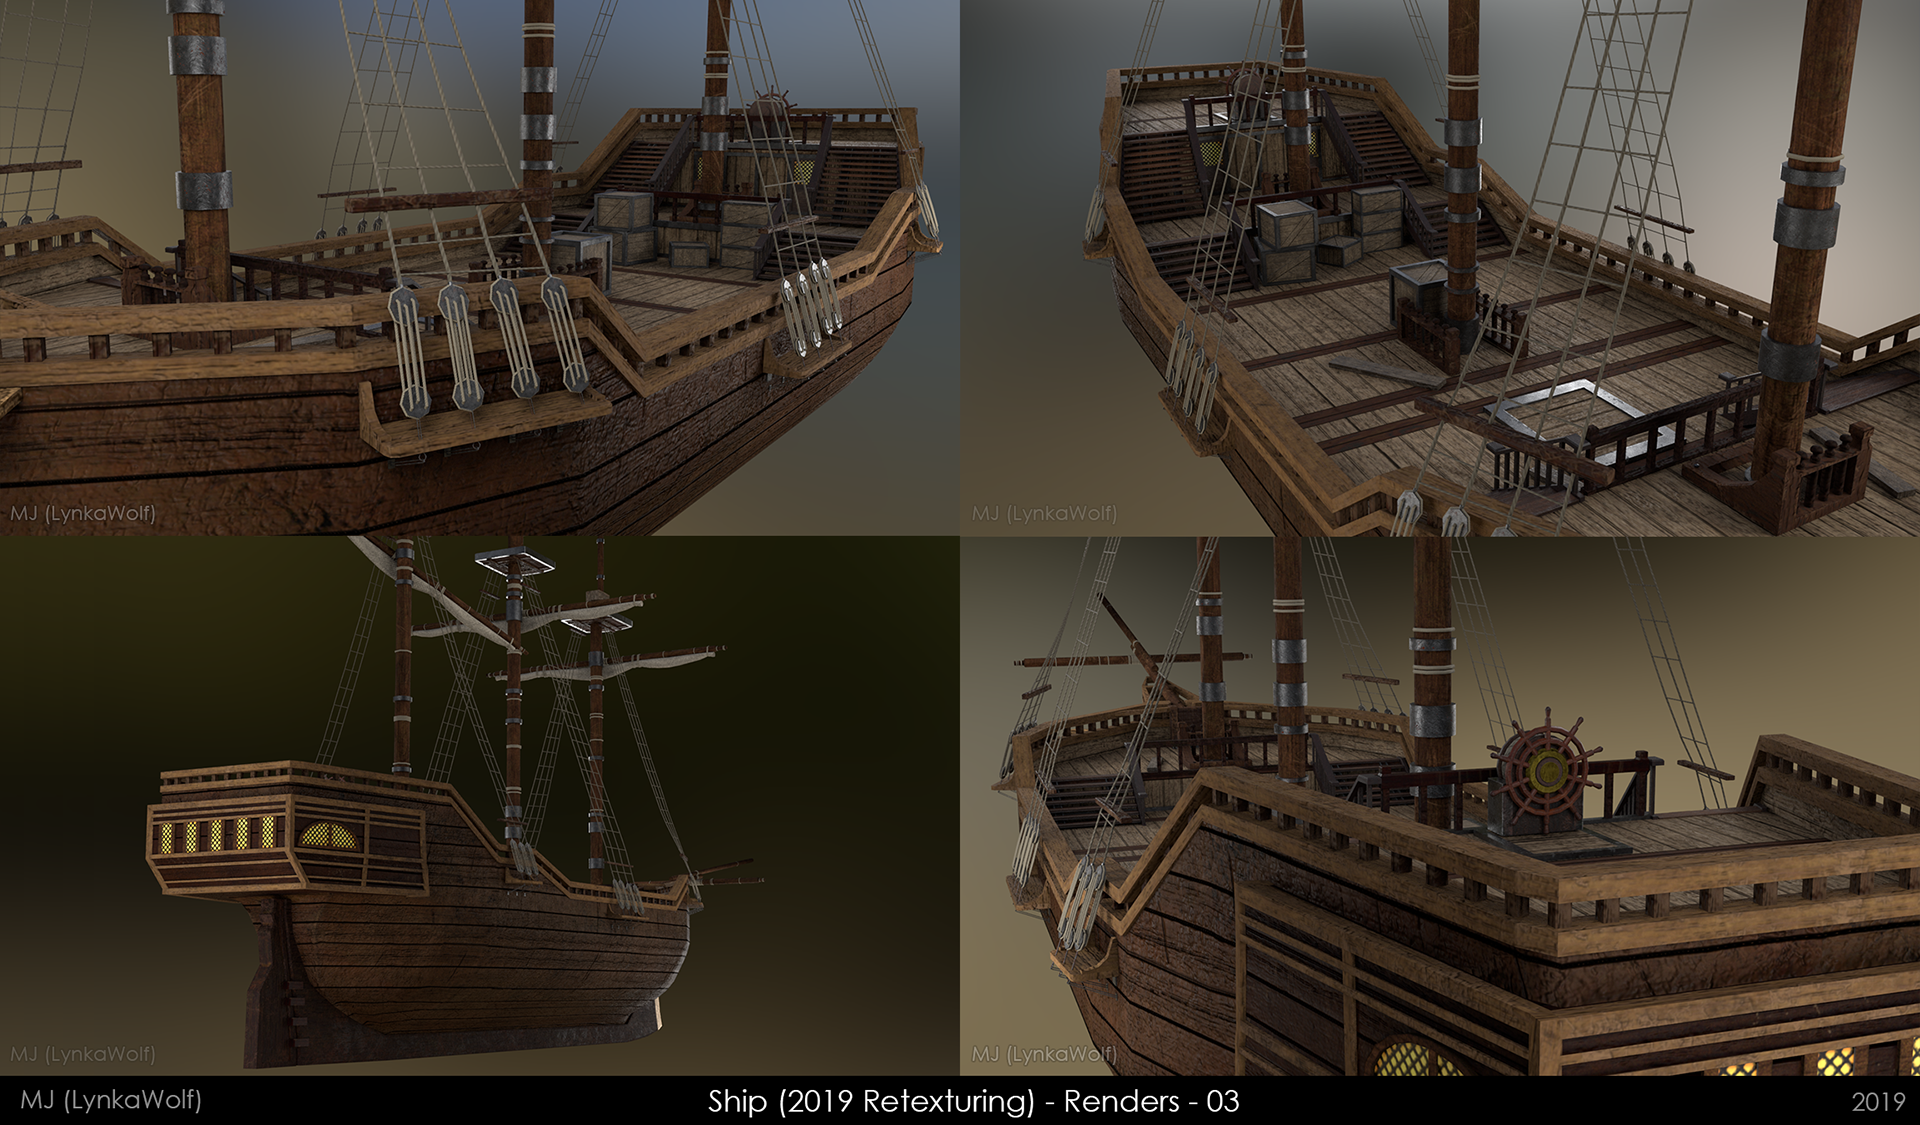
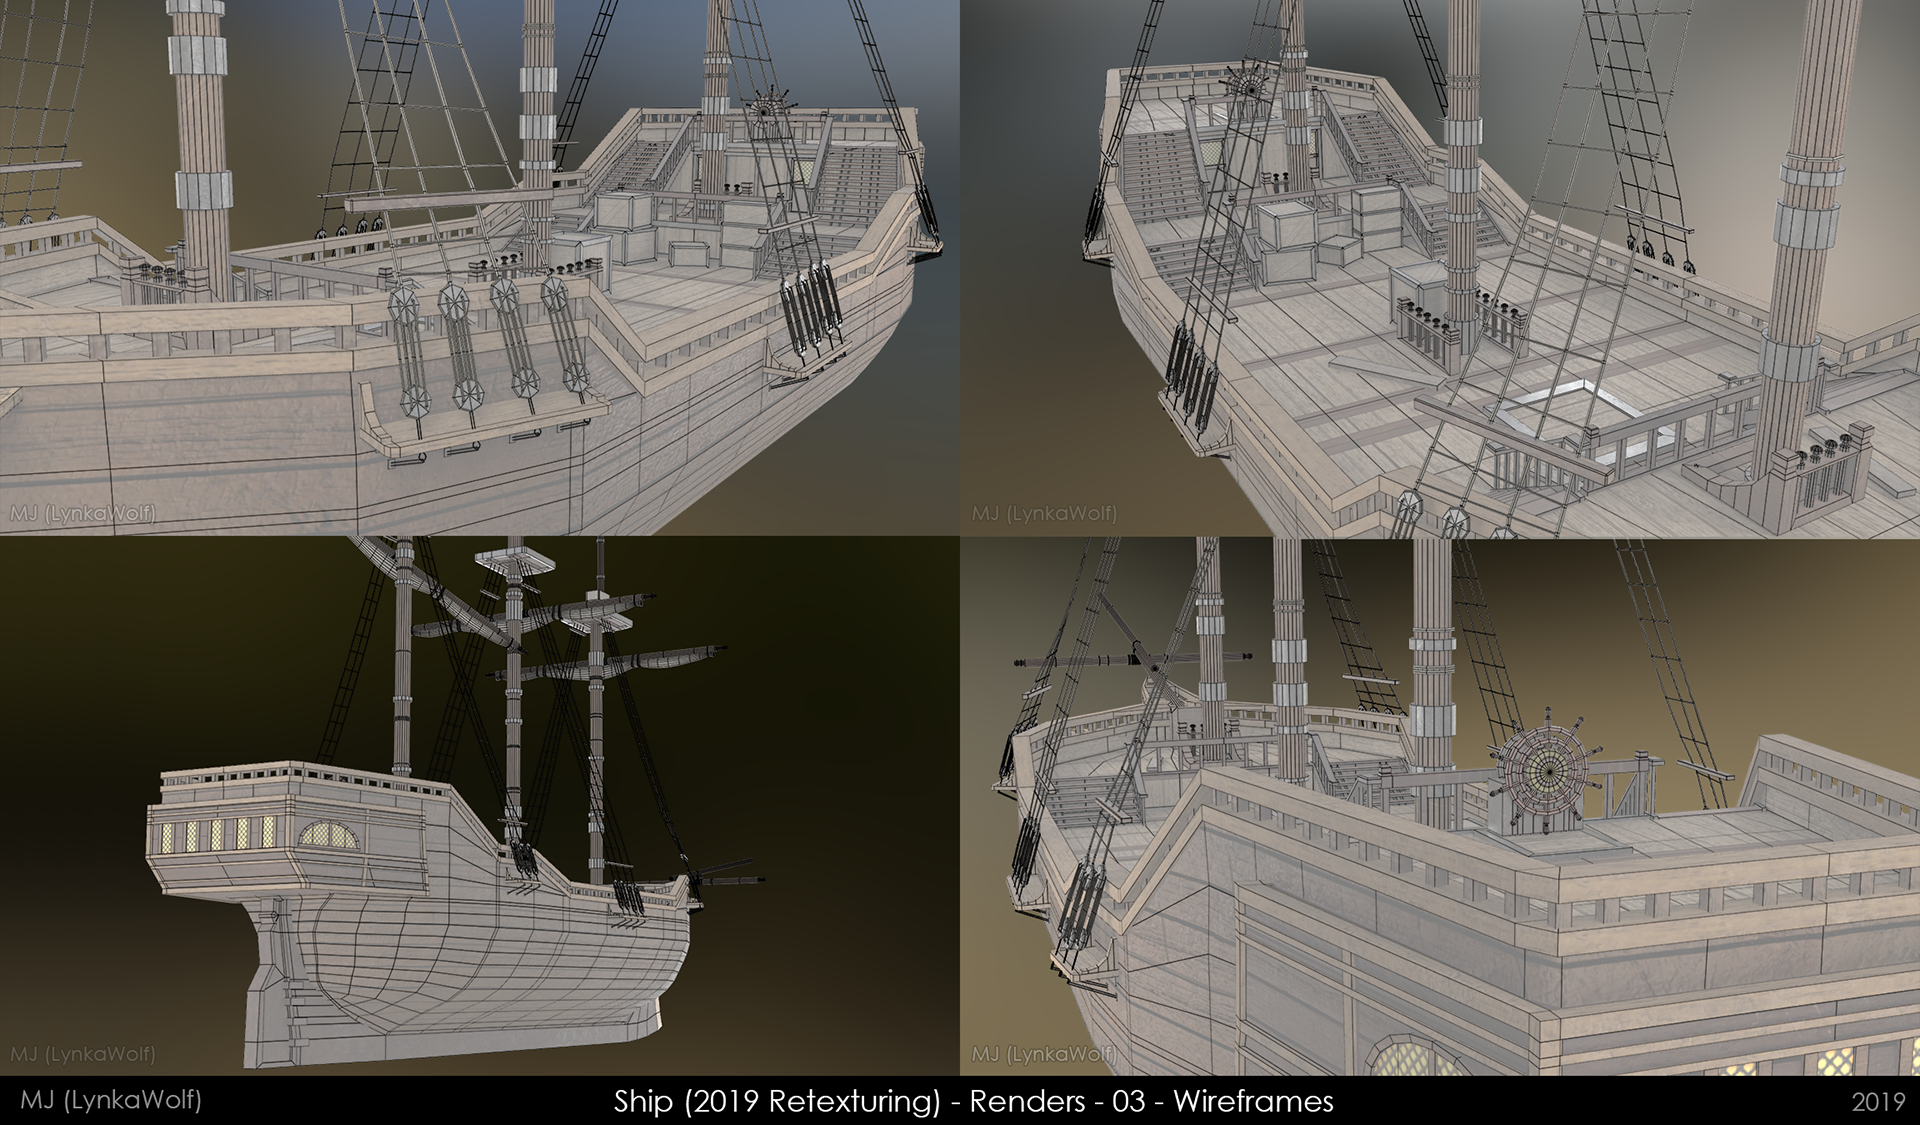
Renders Examples
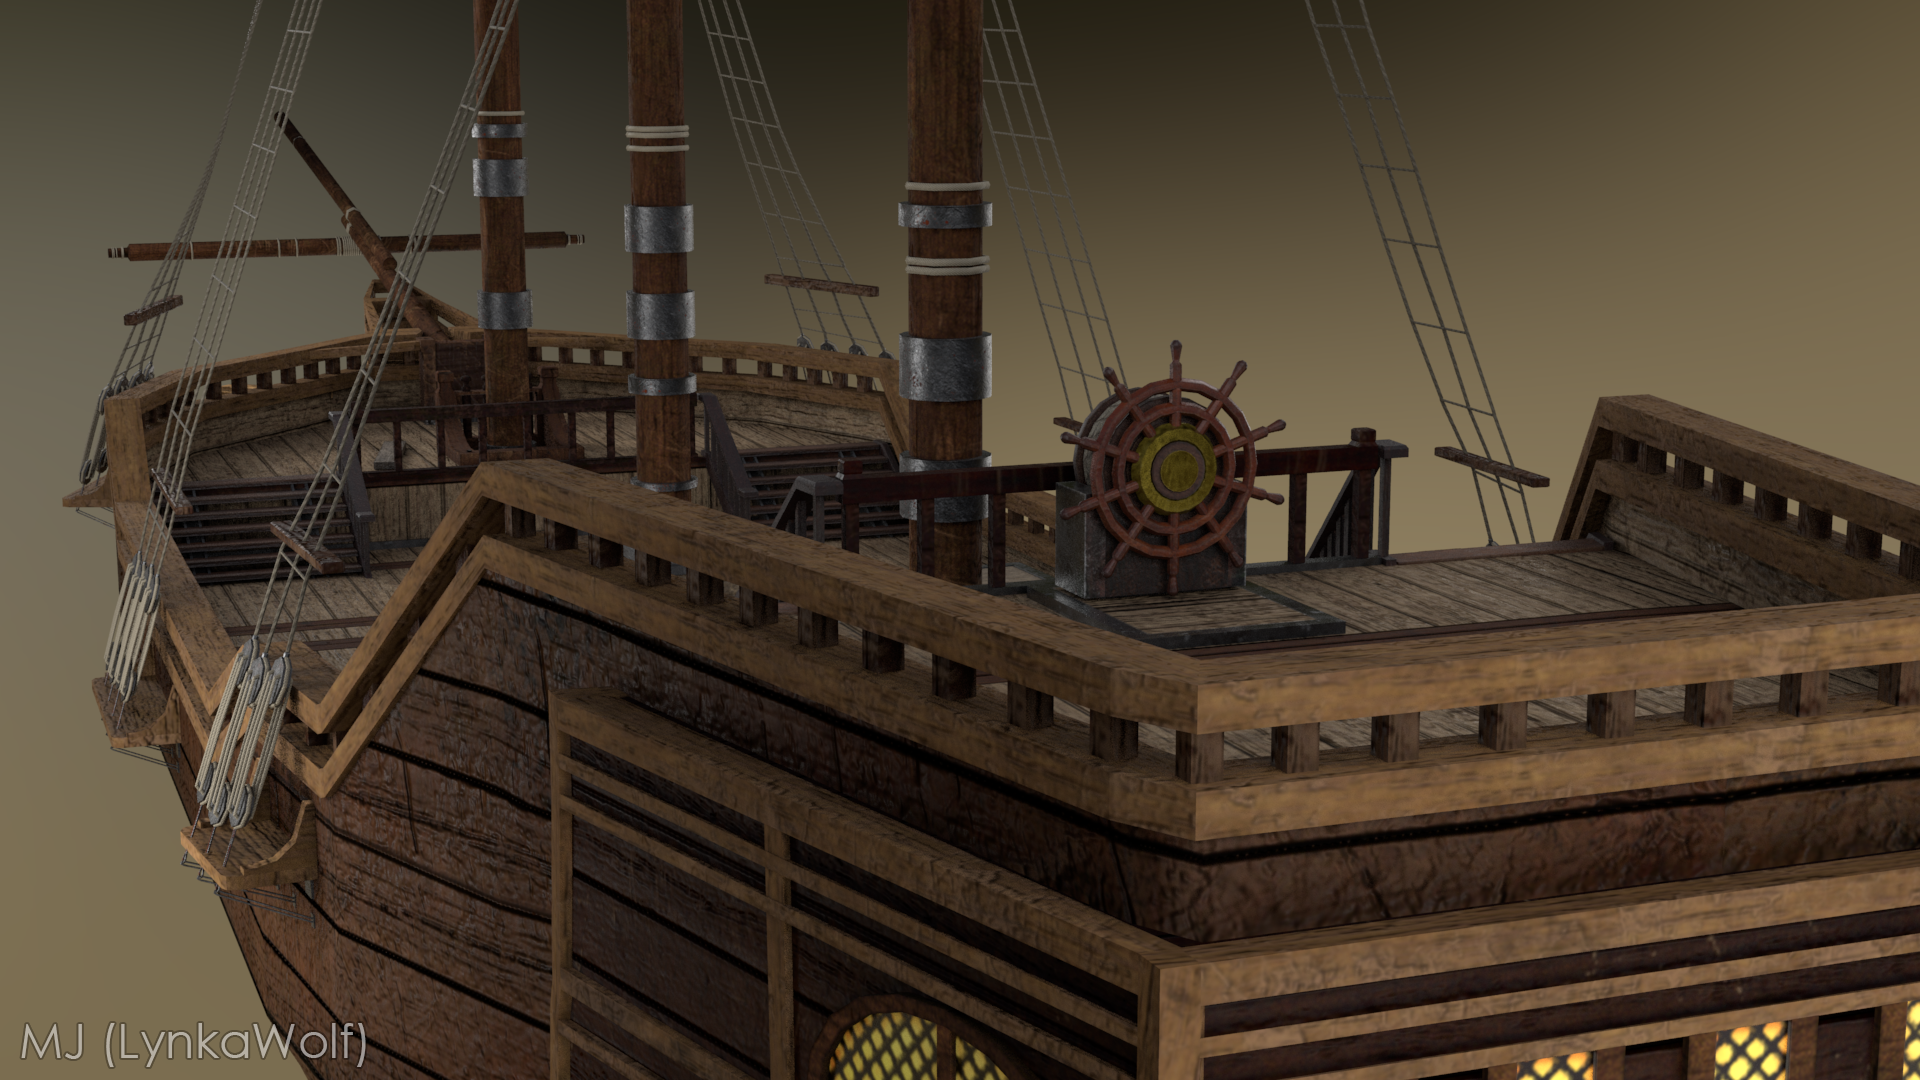
Here are a few collated renders from within Maya, using Arnold, and their wireframe overlays counterparts (click/tap on the images to open them to a larger size).


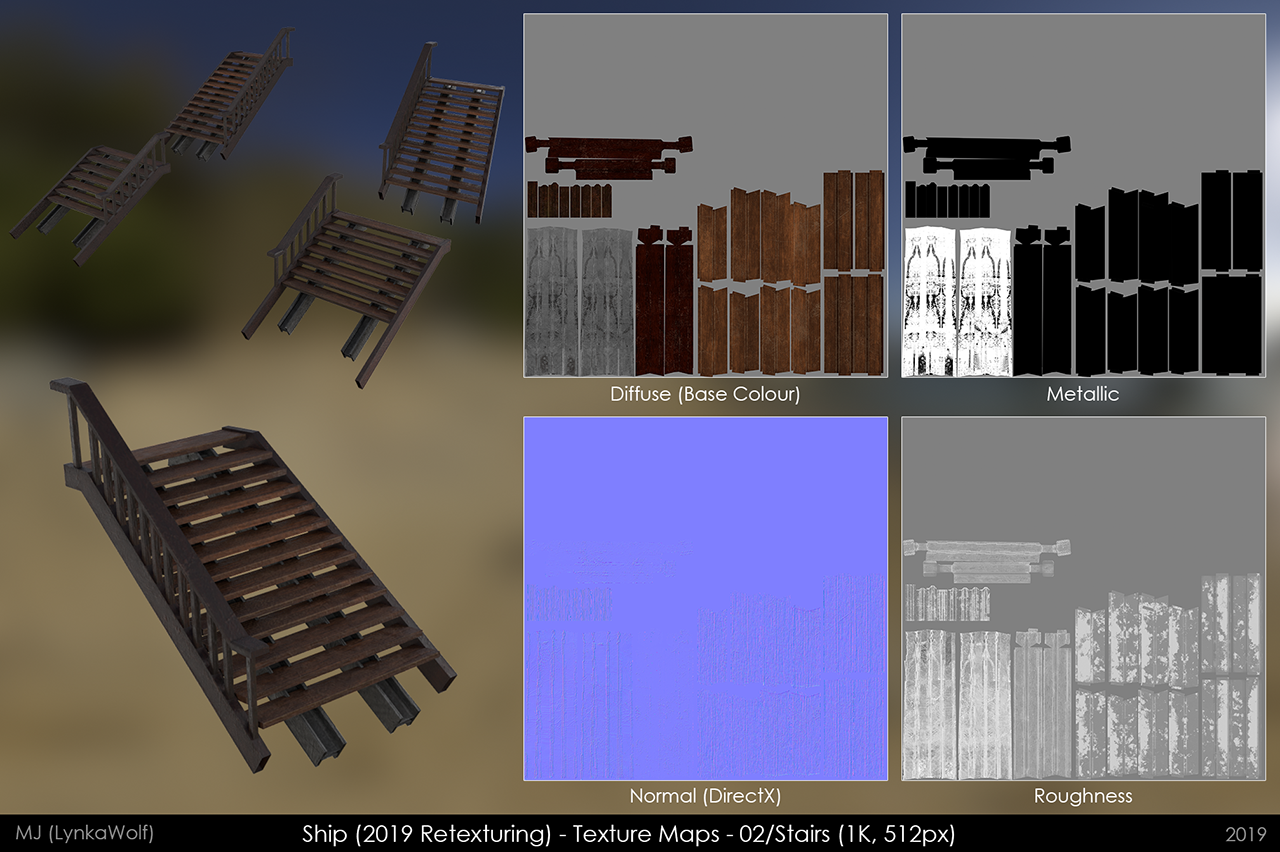
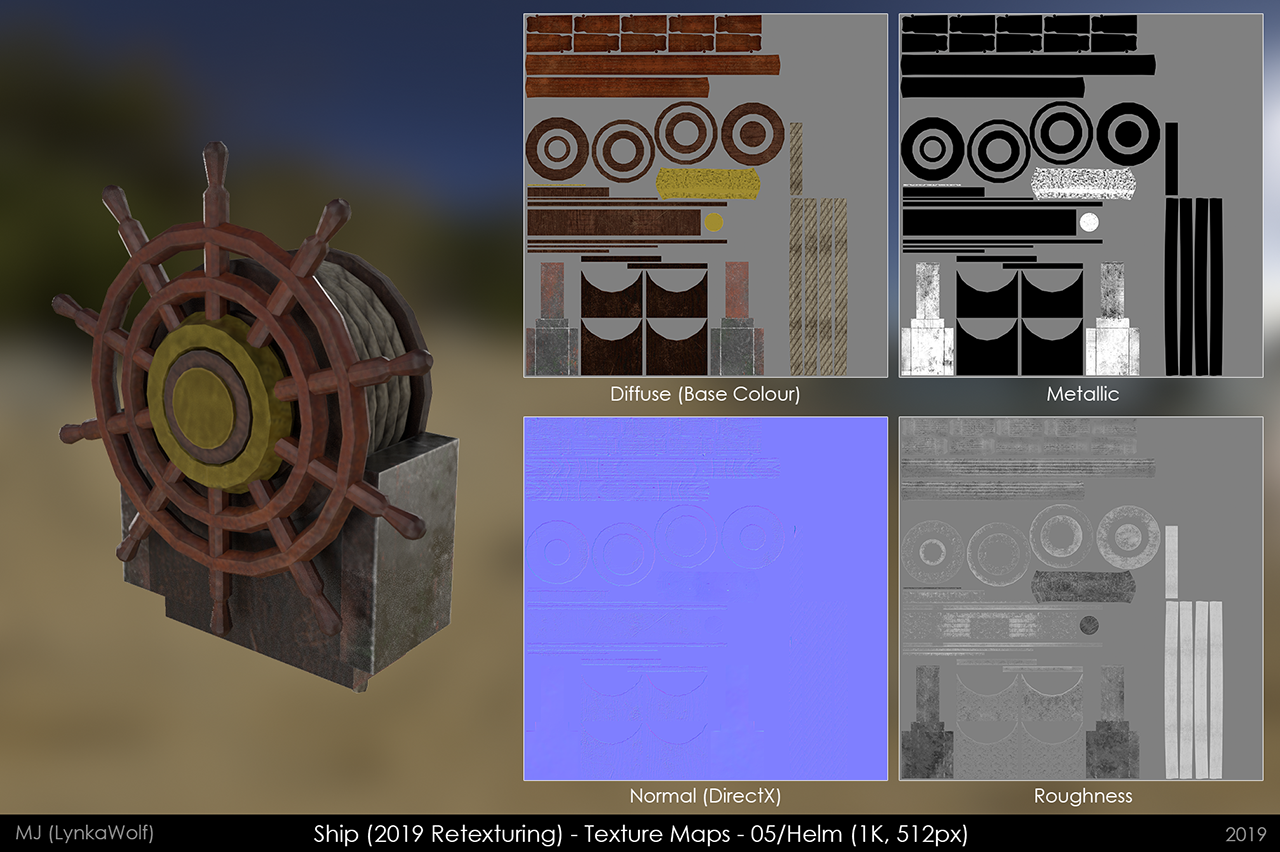
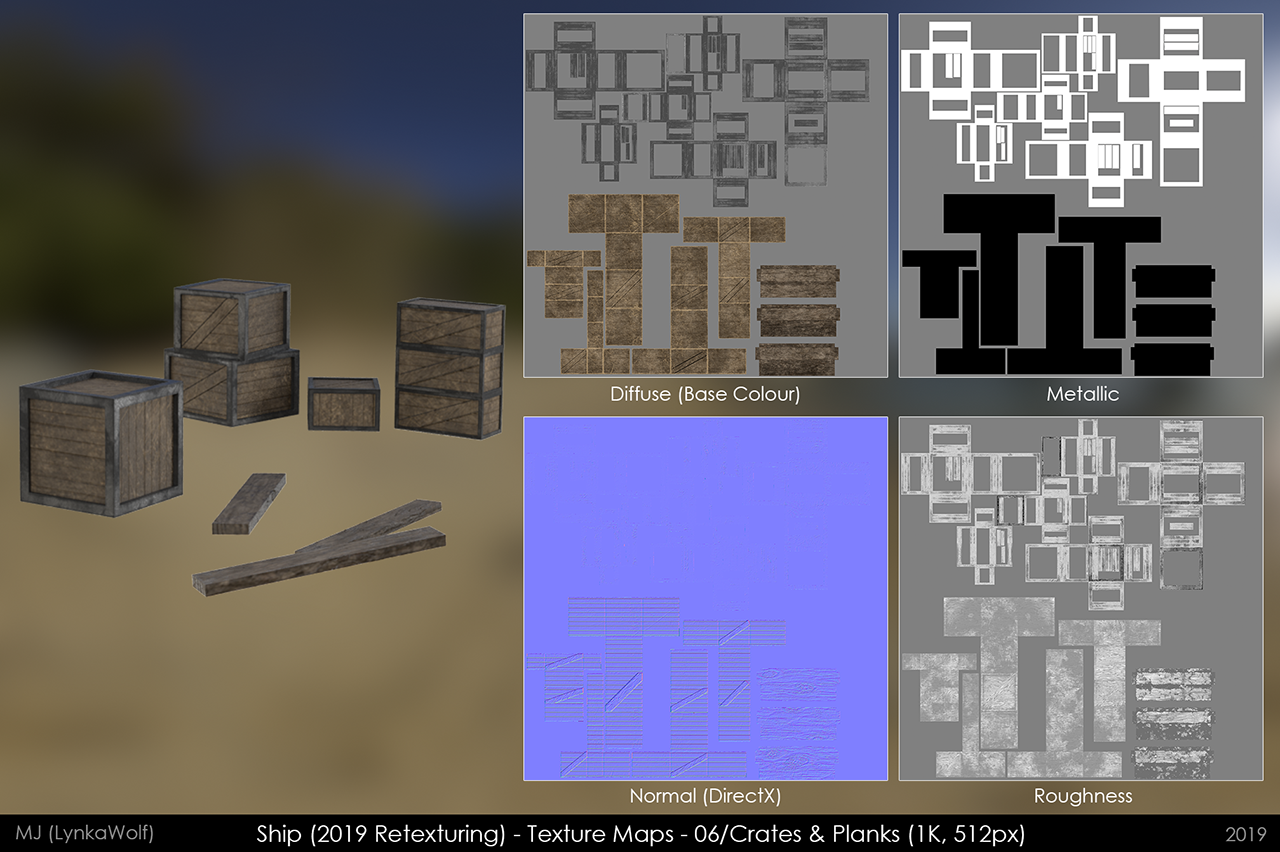
Texture Maps
The 6 different materials/texture sets created for the final scene: Main Ship Parts (4K), Stairs (1K), Rings/Rigging/Ropes (1K), Doors (512px), Helm (1K), and Crates & Planks (1K).
Note that out of experimentation, for the "1K" maps, the implemented Diffuse was 1K while the Metallic/Normal/Roughness maps implemented were 512px. This was to test optimisation/differences and have sharper details for closer renders & inspection of assets, but the maps all exist at the same sizes if needed :). Each texture set also has a composited/cleaned up Height map, but they were not used in the materials within Maya. The normal maps are DirectX based, and though hard to see, there is actually some subtle detail on it even for the Stairs set!
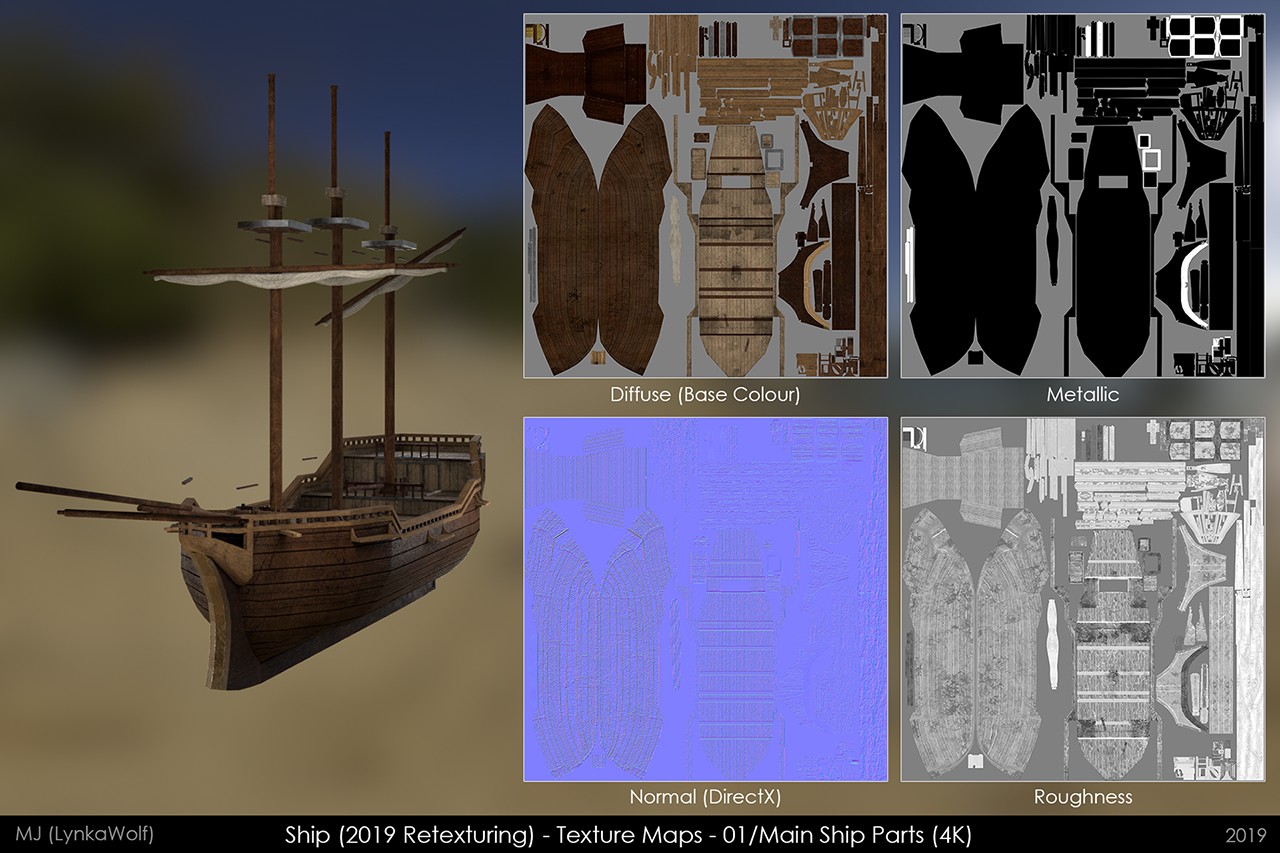

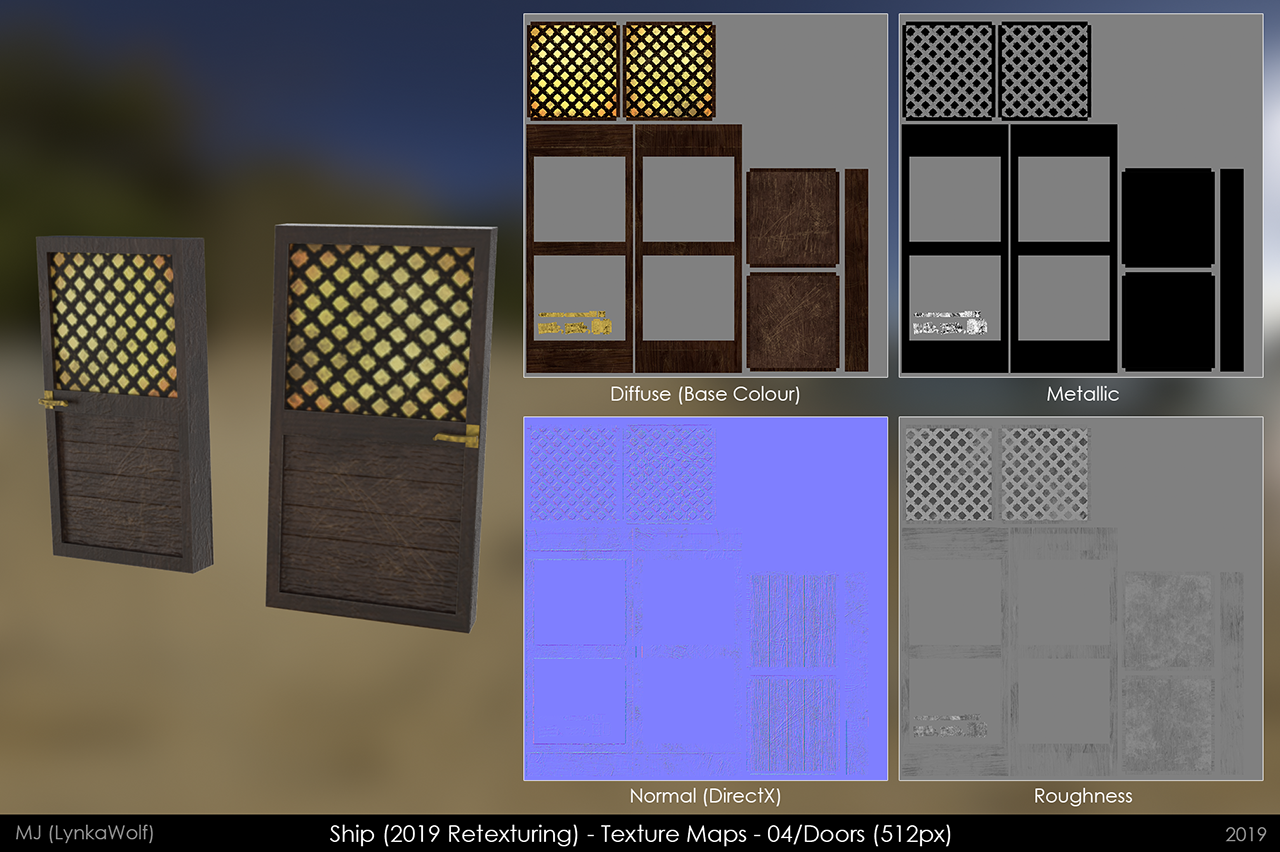
The Main Ship Parts & Doors diffuse textures also exist with a grey-white window version to simulate a lack of interior lighting! The option to switch between the two was however not implemented on Sketchfab, but the idea would be to allow an easy switch between the two versions, should the Maya scene ever be shared :). I also realised while creating the materials in Maya that I probably could have put the climbing nets UVs as part of the Main Ship Parts texture sets rather than the Rings/Rigging/Ropes one, for the sake of sharing a similar resolution/texel density with the rest of the main mesh, especially given their height/size within the scene, despite their thin width & depth. Another thing to try out & learn from for future projects :) !
This project is also available on ArtStation :)
Thanks for passing by!