Wanted to practice digital sculpting, retopology, and handpainted texturing, and character art at large, and since I hadn't done a "buff" male character before, thought I'd give my boatswain boy Ronan from my stories project "Legends of Erayfen" a go :) Never made a proper fullbody concept of him, wanted to keep his design simple like for Eliza & Roxanne, and focus on going through the pipeline. Used a mix of Marc Brunet's "3D Hand-Painted Character for Games" tutorial, Danny Mac's retopology tutorials, and bits of Justin Marshall's "Game Character Sculpting in ZBrush" course, based on previous notes. Experimented with handpainting Marc Brunet's way (starting with a diffuse base made in Photoshop with bakes from xNormal) in Substance Painter instead of 3DCoat like I'd done for my Eliza & Roxanne models, it was fun xD And bought Marmoset Toolbag, so gave it a go for renders :). Learned loads, especially when troubleshooting xD A summarised version of my process is listed at the bottom of the page!

Final Model
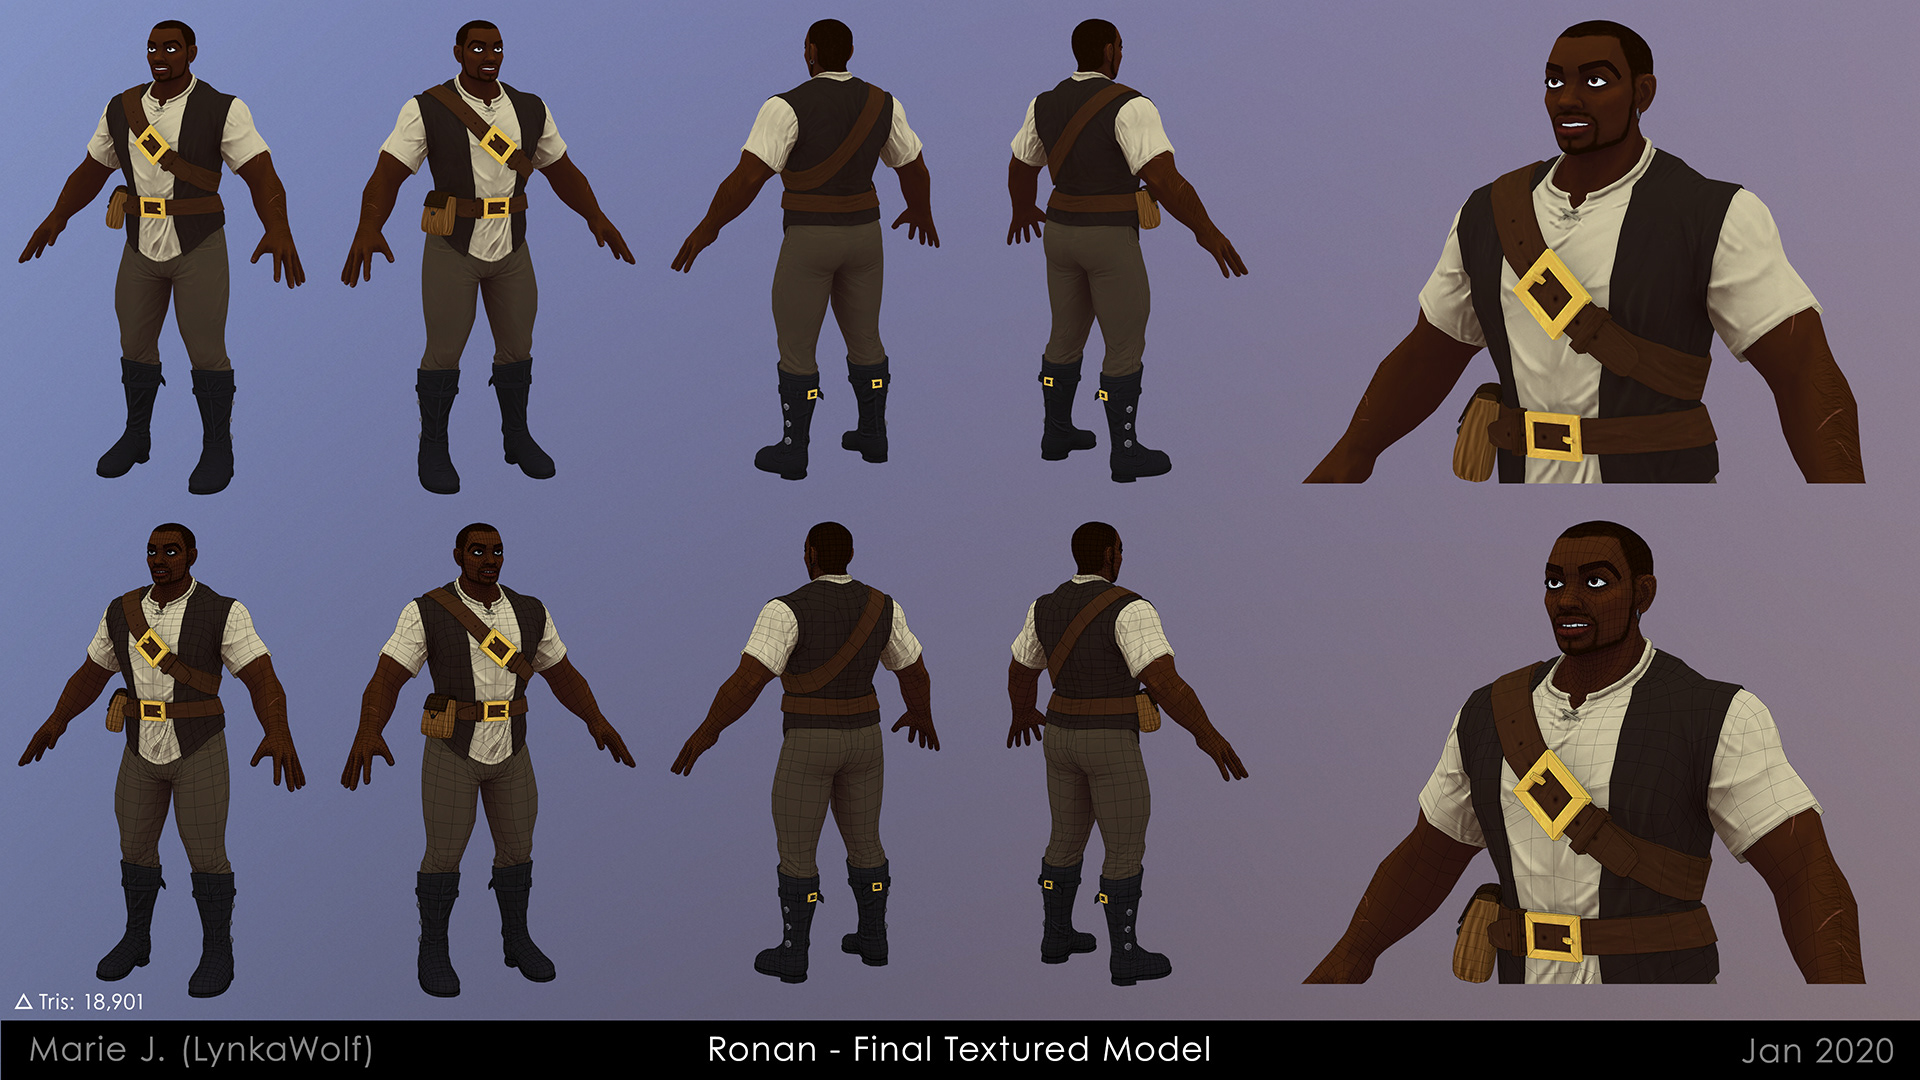
Ronan - Final model turnaround & one bust close up, with and without wireframes
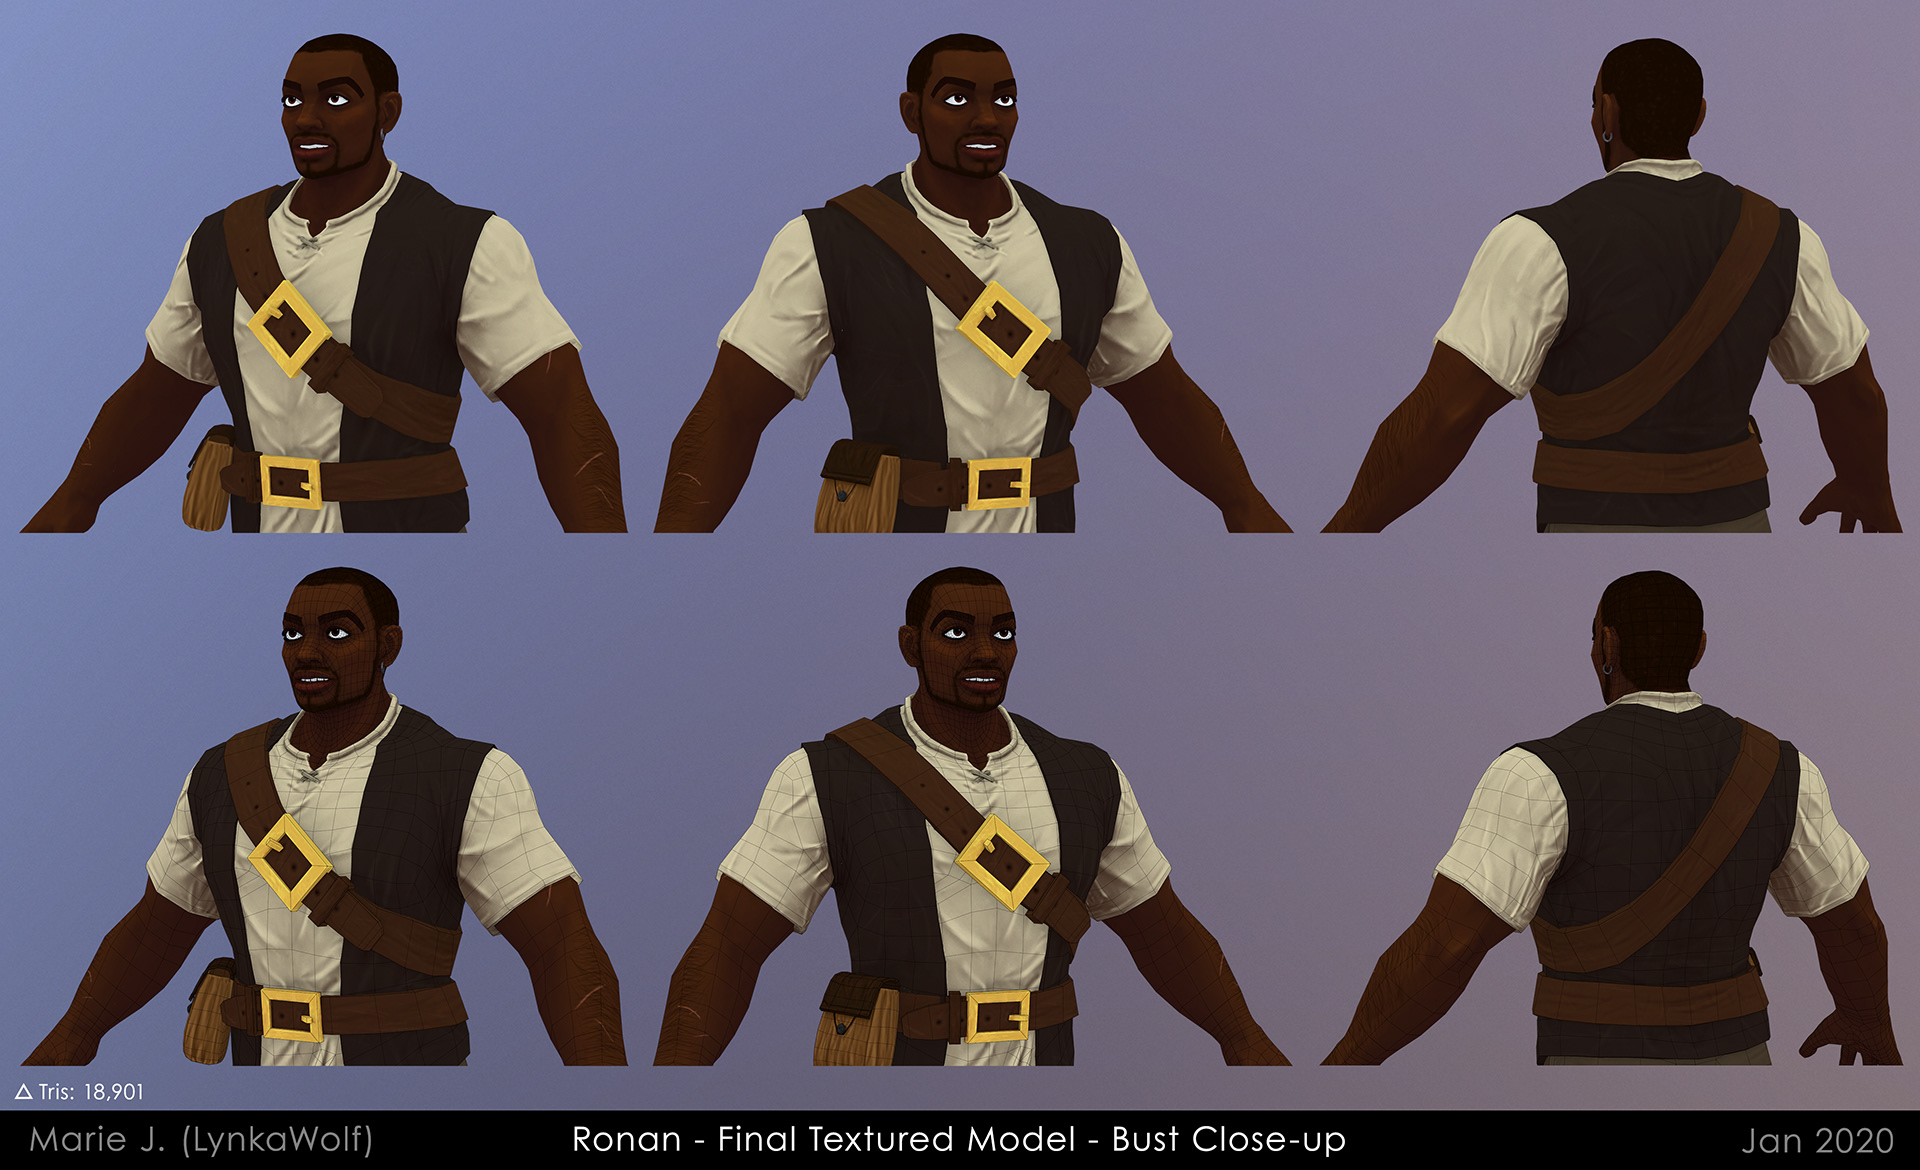
Ronan - Bust close-ups with and without wireframe
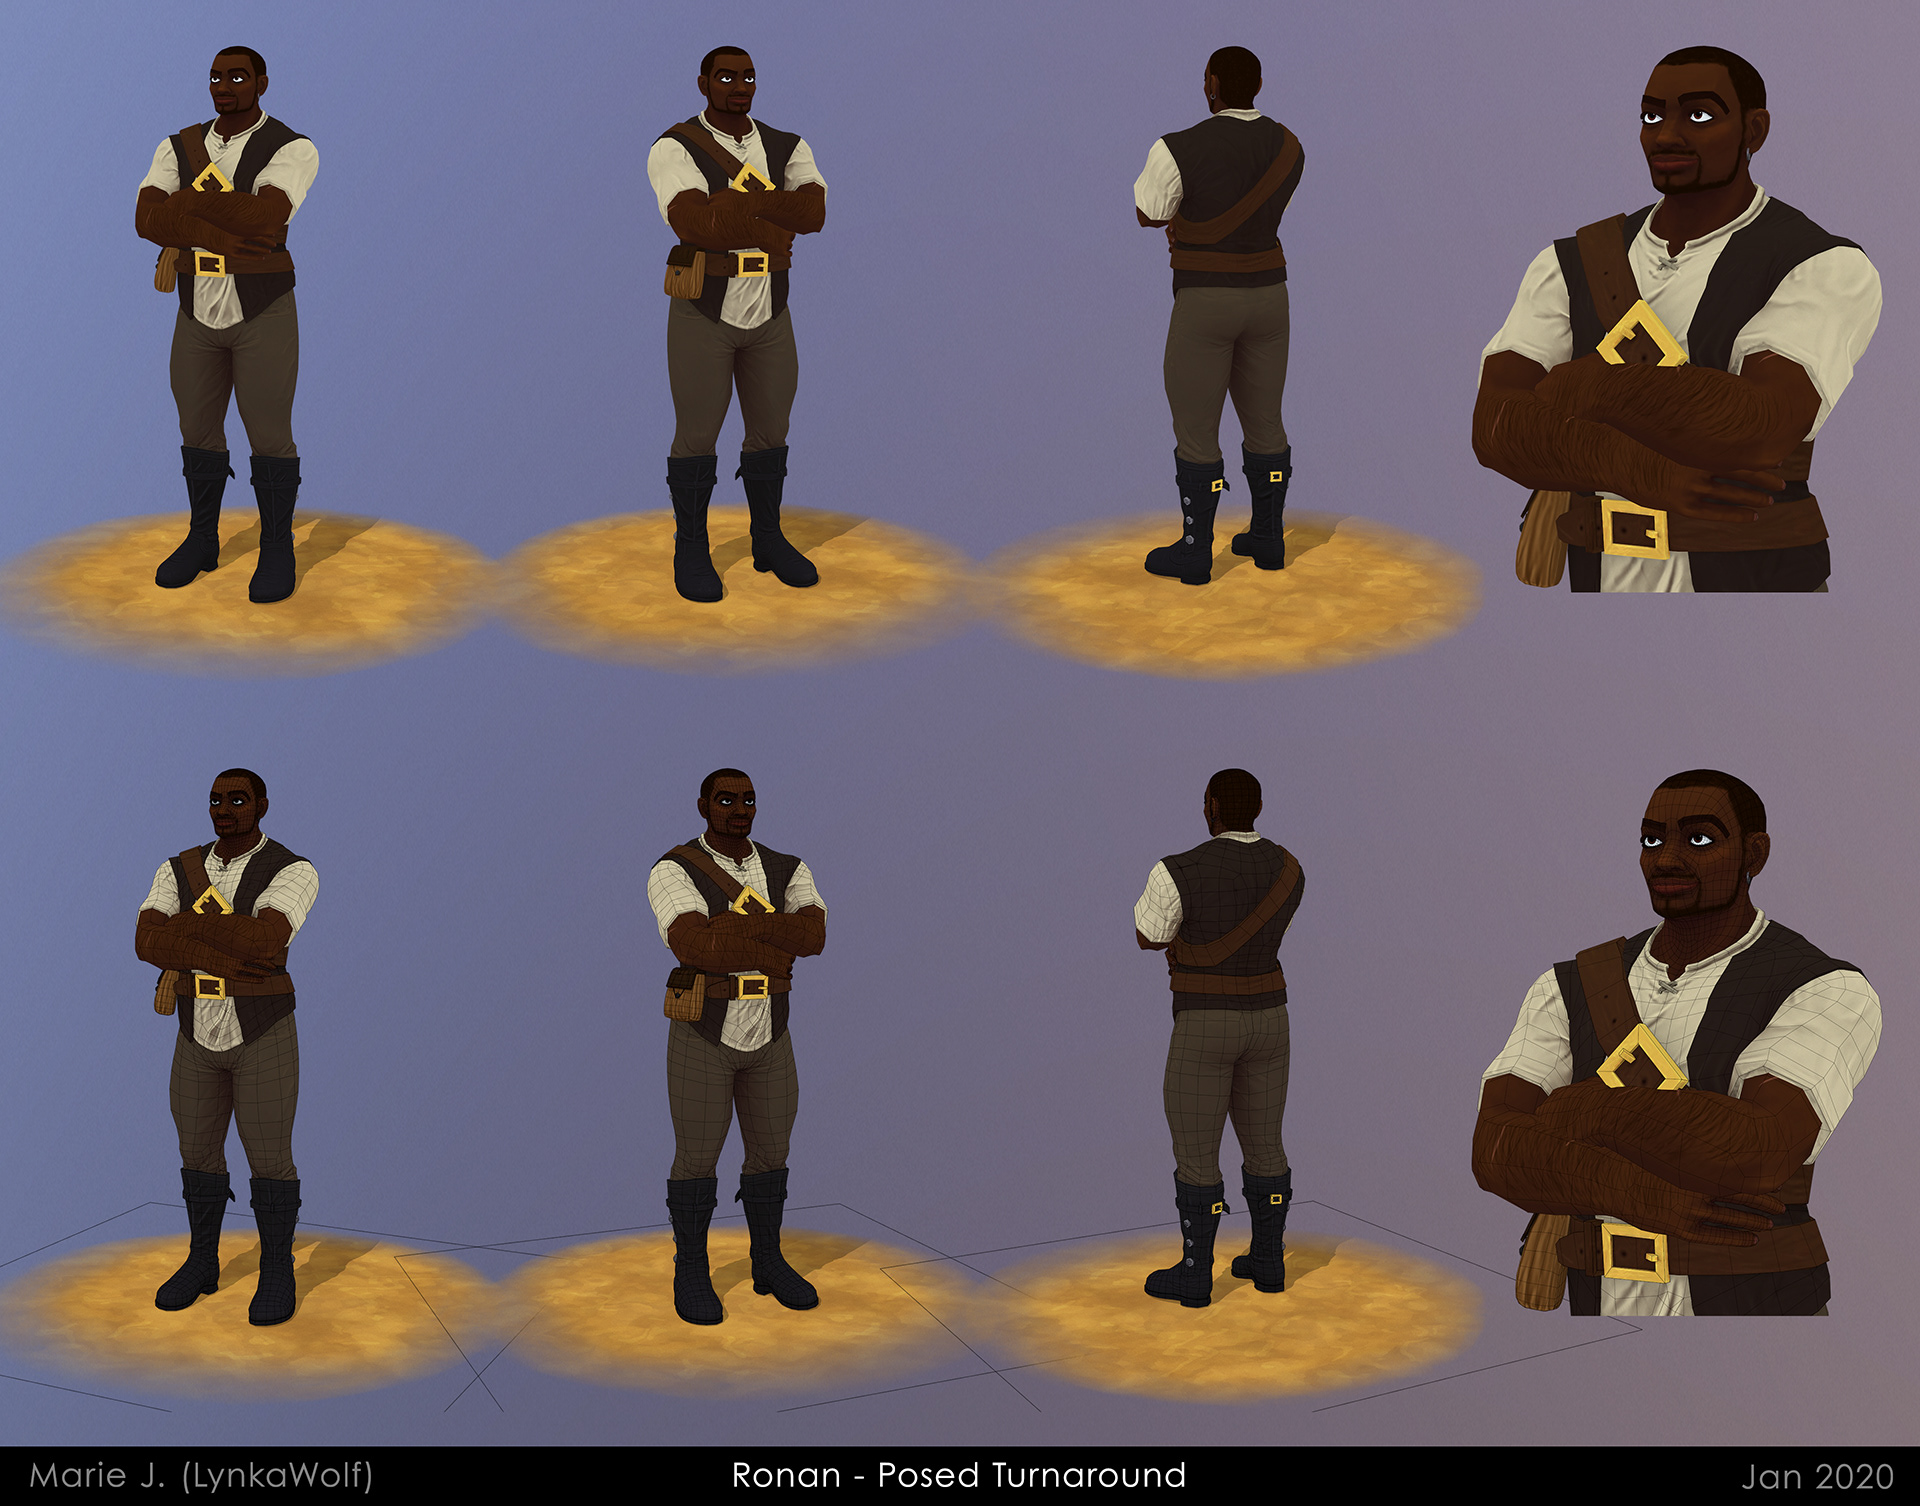
Used Maya's Quick Rig (and added finger joints to it) for the first time to pose him, and made quick blendshapes for facial animation. Couldn't get the animation to export properly despite hours of troubleshooting, but kept that pose instead :).
Ronan - Small, basic upper body animation playblast from within Maya (simple blinking to test blendshapes & quick rig) - Animated GIF (if still, it is viewable on the ArtStation project page)
Textures

Ronan's two diffuse texture maps (2K). Generated a base in Photoshop from AO, Normal and Bent normals maps from xNormal, used some colour gradients, then painted more in Substance Painter. Painted the body for base mesh/alternate clothes purposes :)
High-resolution Sculpt
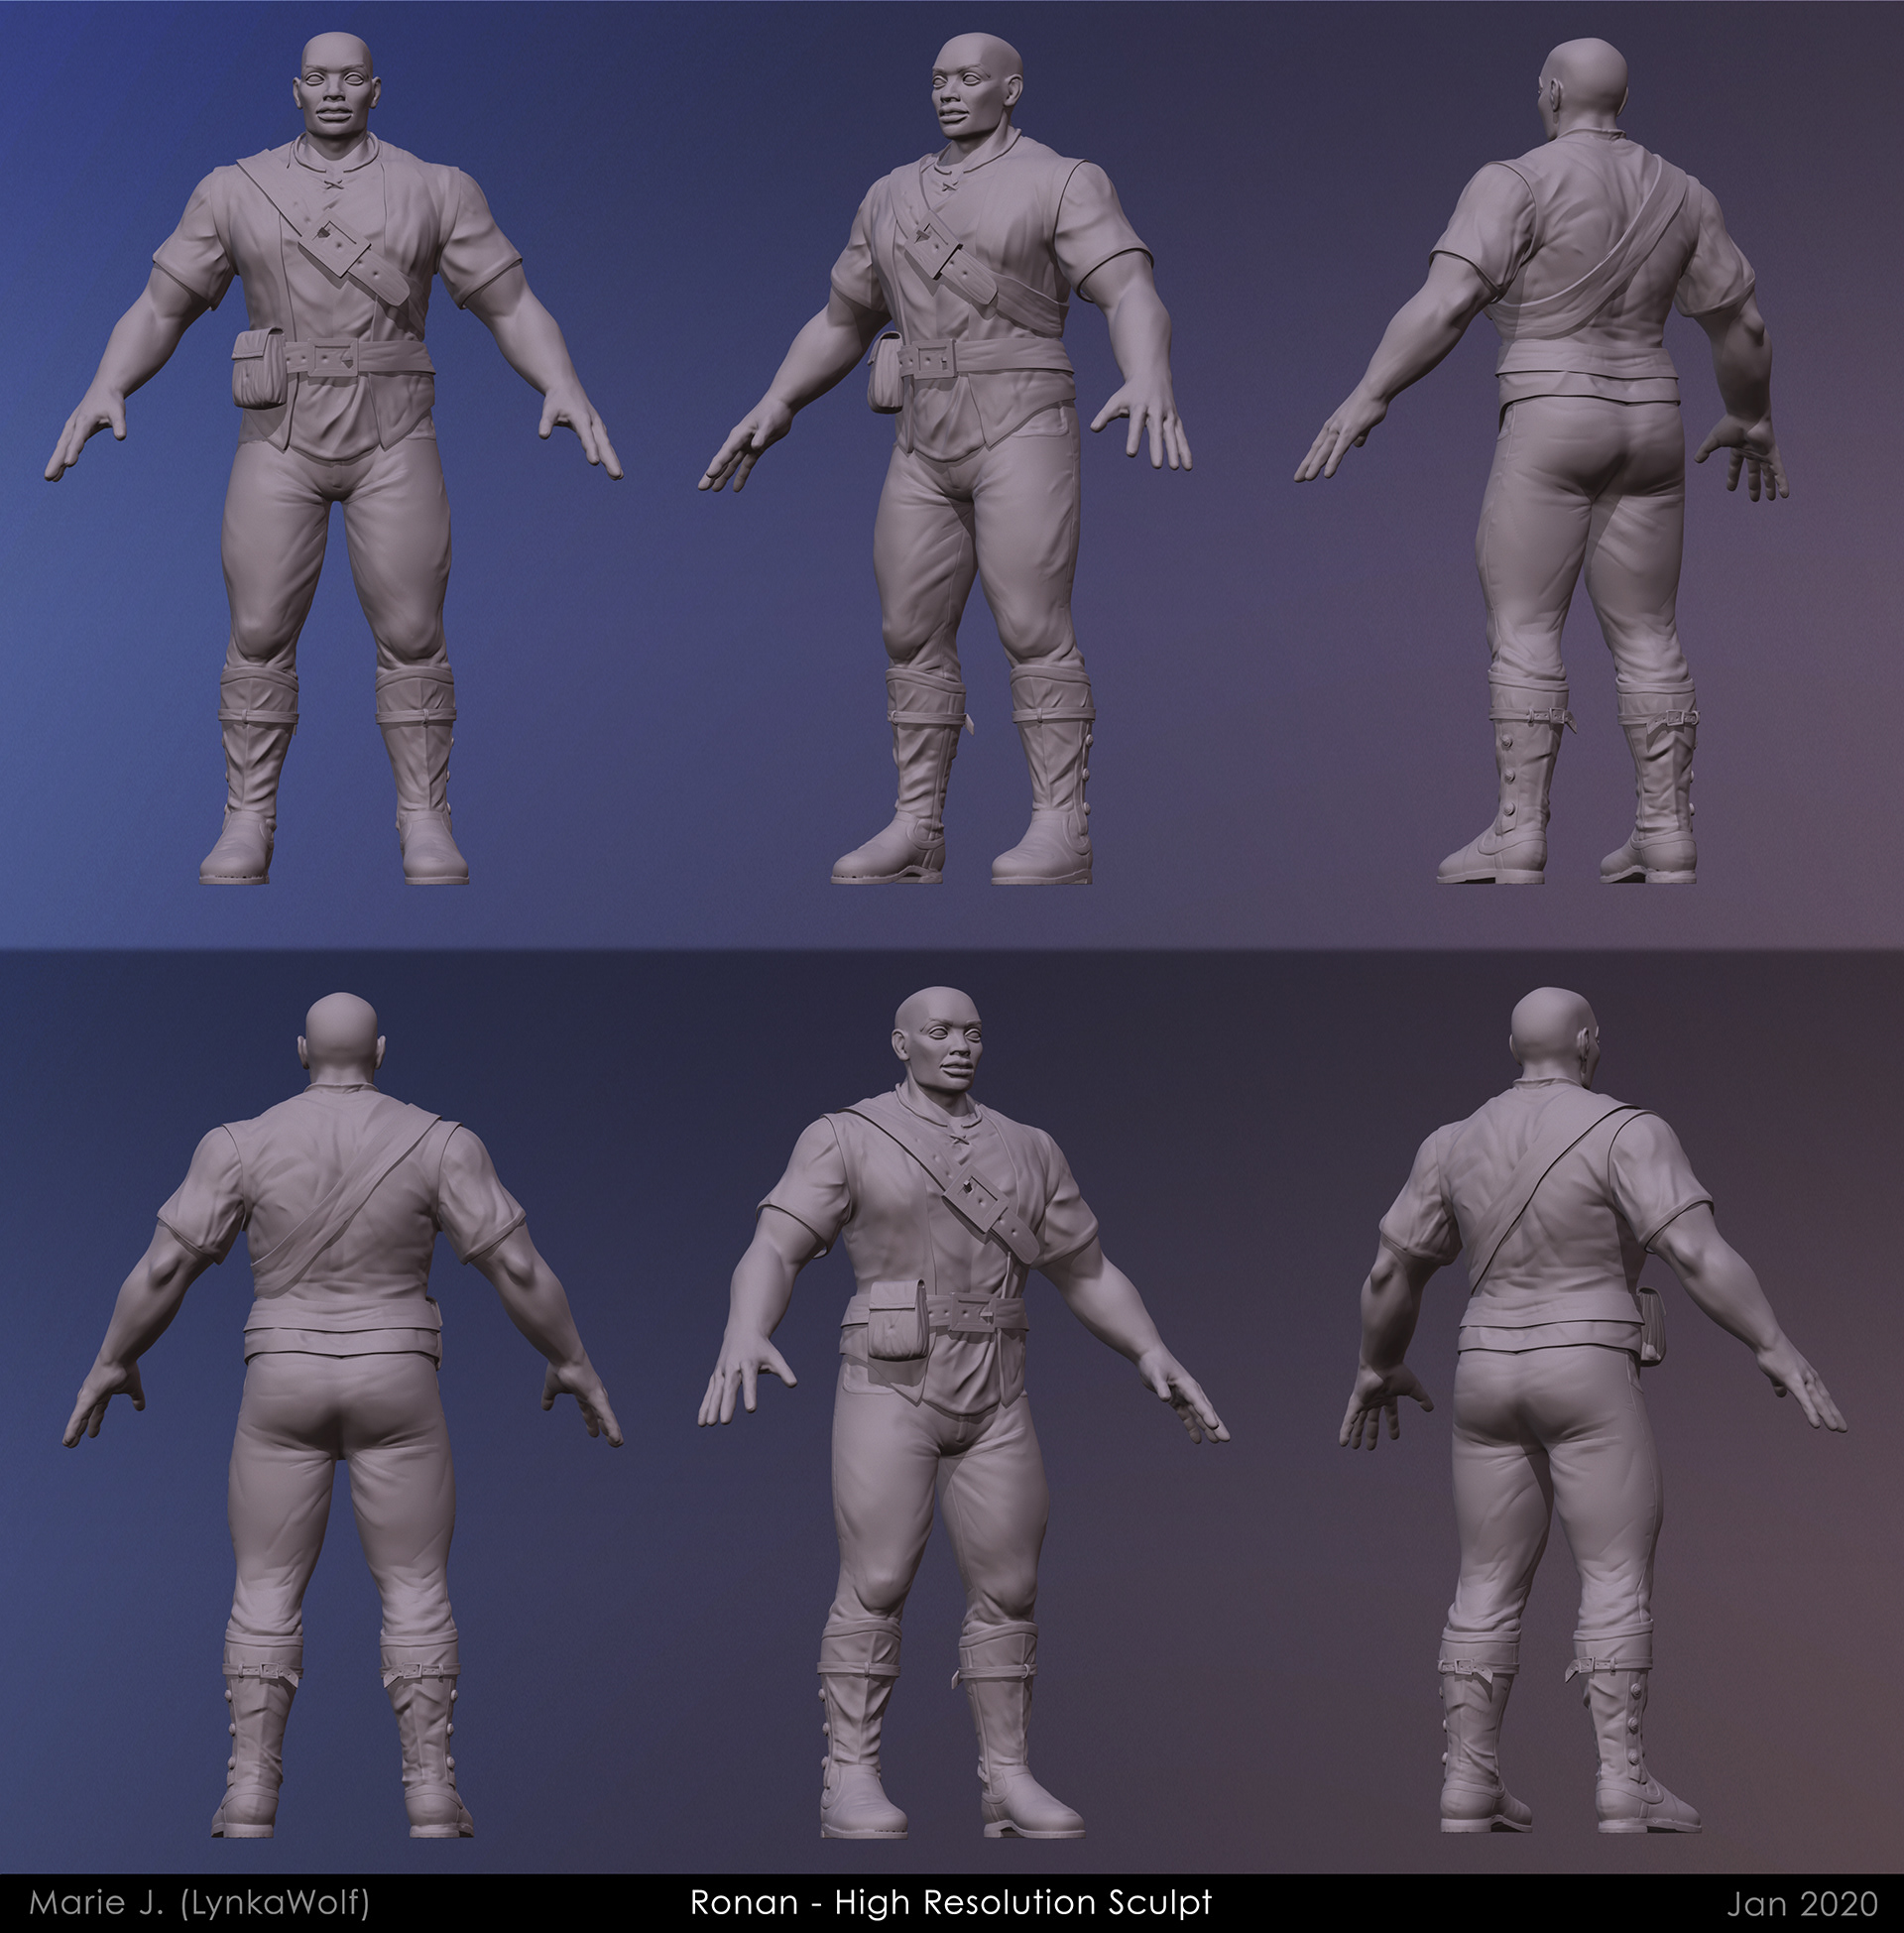
Ronan - High-res sculpt turnaround (sculpted in ZBrush, here rendered in Marmoset Toolbag). I changed the pouch's position slightly during the texturing stage.
Inspiration/Concept
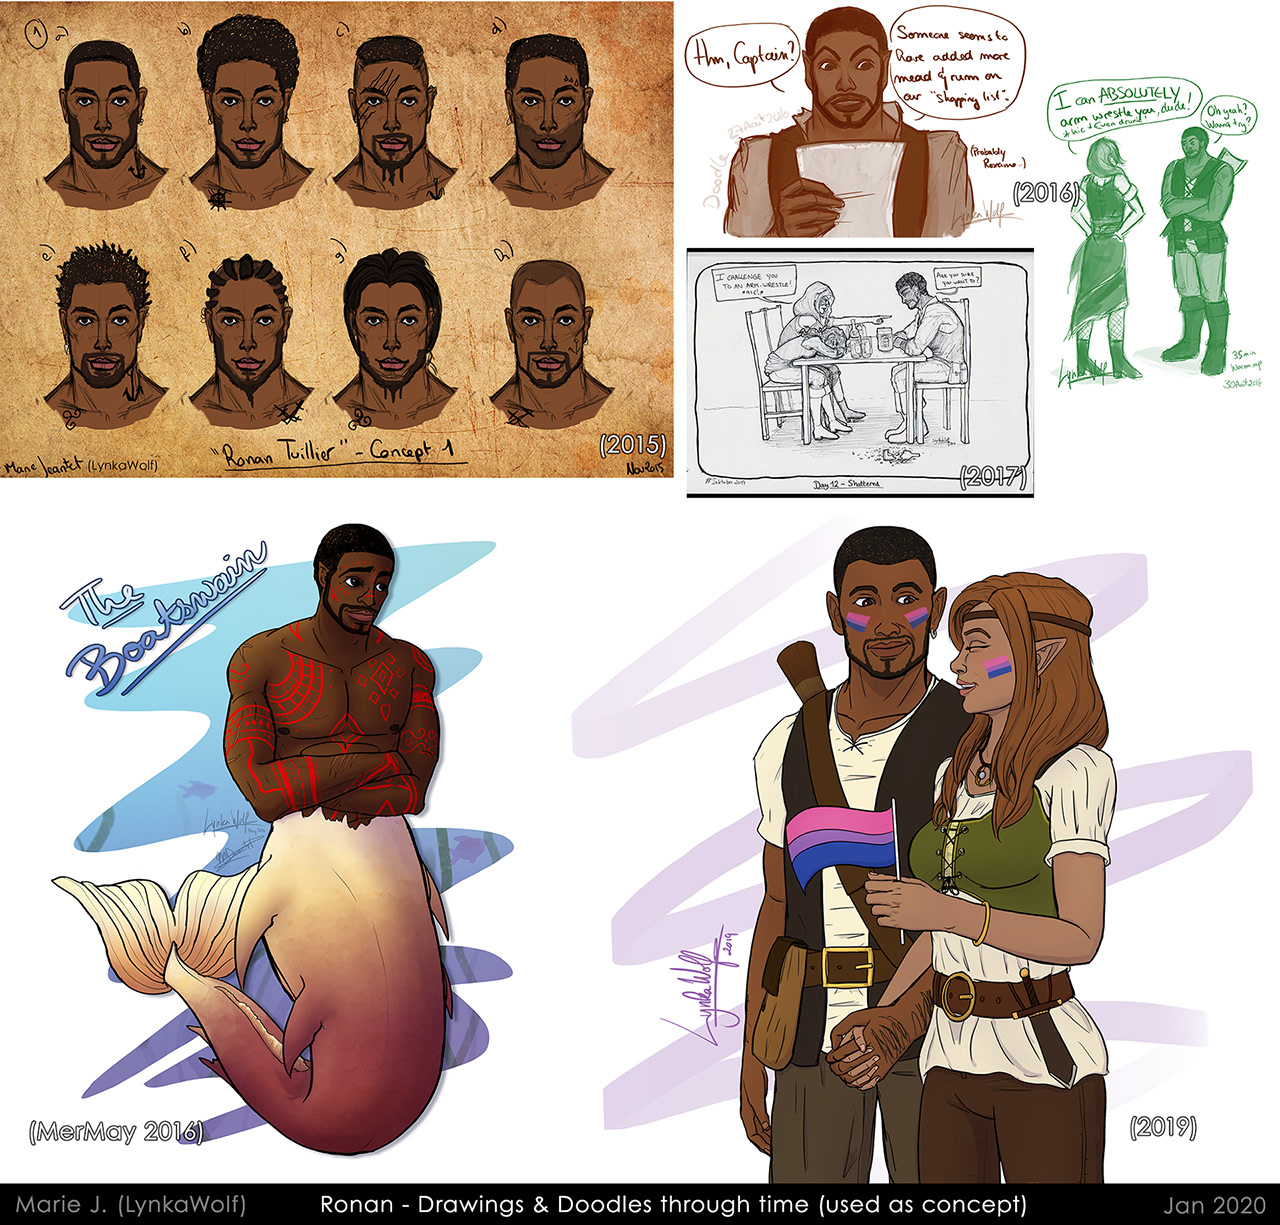
The original concept art I did in 2015 (never did a fullbody one), and the few doodles & drawings through the years, used as base inspiration for the final model design. He changed quite a bit through time + tests! Final model's his latest design :) Wanted to give him a physique closer to his 2016 version but with the clothes of the 2019 drawing.
Process
I will make a blog post detailing the process/journey of this project, but in short, the steps were:
1) Digital Sculpting of the body in ZBrush (using ZSpheres for a start-armature, then sculpting with subdivision levels. Mixed it a bit with Danny Mac's tutorial for sculpting a stylised head, when doing the head).
2) Body retopology in Maya (following Danny Mac's retopology tutorials, with some personal experimentations), and UV Unwrapping once it was done.
3) Blocking out the clothes/accessories in Maya, and adding extra edge loops to retain edges when subdividing in ZBrush.
4) Digital sculpting of the clothes in ZBrush, using subdivisions.
5) Clothes/accessories retopology in Maya, and UV Unwrapping each object once it was retopologised. Put the UV Shells on various tiles to keep a clear division between objects.
6) UV layout for two maps: Body (main body, eyes, mouth), and Clothes. Each map/UV tile was given a basic shader to keep the UVs separate later on. I wanted to texture the Body to use as a base male body mesh in the future, perhaps, as well as allow various clothing changes to Ronan if I one day want to :). Maps optimisation was not a concern for this project.
7) Exploded the high-resolution & low-resolution meshes then baked Ambient Occlusion, Normal, and Bent Normals maps for all meshes.
8) Used Marc Brunet's tutorial for setting up a base diffuse map in Photoshop from these maps and a use of colour gradients.
9) Texturing the meshes in Substance Painter (added details, re-baked ambient occlusion with all meshes put together, etc.)
10) Post-processing the texture maps in Photoshop where needed.
11) Deleted most hidden faces of the Body in Maya, then used Quick Rig (and added finger joints, and did a lot of troubleshooting from that point onwards) and blend shapes to make a basic pose for Ronan. Also made a very simple animation, but it would not export properly as an FBX, so I kept the still pose and made a playblast of the animation instead.
12) Imported the neutral pose and posed models into Marmoset Toolbag for rendering :)